Glass Containers? Paint Them!

     I don’t know about the general population, but I tend to use clear containers for storage.  I use Mason jars for flour and such in the kitchen.  Jelly jars for those small things that always get lost in a drawer.  Potpourri bowls for hair ties and clips in the bathroom.  The only issue I have with this is being able to see everything in these containers.  

     In my quest to personalize my apartment, I decided to fix this problem.  The fact that I just bought a pack of paint brushes may or may not have had something to do with it.  So, without rambling on too much, on to the project!

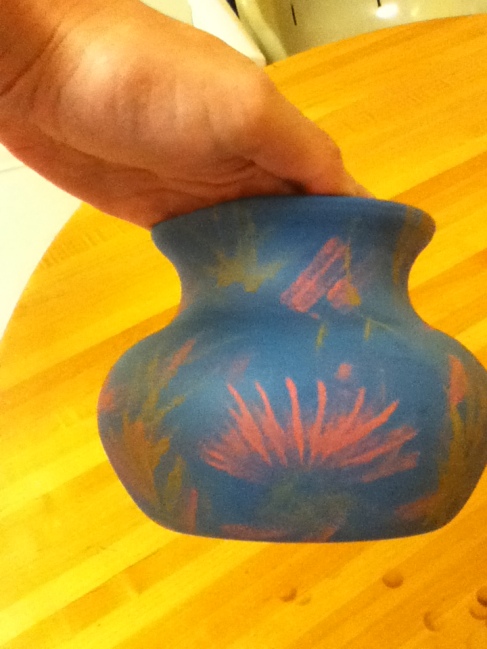
Image

     What I used:

  • Small sponge brush
  • Shallow container (for mixing paint)
  • Paint (I used craft paint, $.60 a bottle at Walmart)
  • Newspaper (for the work surface)

     The first thing I did was figure out what colors I wanted and mixed them up. If you need to, you can add a small amount of water to your paint if it’s too thick.

      When you start to paint, remember that you don’t need to have every inch of your brush covered in it.  Get a small amount of paint on your brush and dab your container. It should cover a fair amount of the surface, just widen the area as you dab. 

     Set it aside and let it dry, then do a second coat if you think you need to.  Or maybe you want to get all fancy and do a design on it.  Whatever floats your boat.  The tip of my sponge brush is what I used to make my pattern.  

     Hope you have fun doing this project. Let me know how it turns out!
End Table Revamp

Unless you have the money to invest in awesome furniture, you kind of just have to get what’s readily available (and cheap).  However, that shouldn’t mean you have to be dissatisfied with anything in your home.  Get creative!  There are so many things you can do to change the look of generic furniture. This post will hopefully show you how to do just that.

The tables I found at our local Family Dollar store were pretty basic.  I paid $20 for a black “wood” end table and $25 for a matching coffee table.  The assembly was super easy and I had both of them put together and being used within half an hour.  Just make sure you buy something that’s sturdy enough to be used for whatever needs you have.  Obviously, you don’t want a tiny, flimsy table if you have a very heavy antique lamp you’re going to set on it.

Here’s a list of items you’ll need for this project. Keep in mind that you can use whatever you would like. Think of this list as more of a guideline as to what you can do with your tables.

  • Table
  • Newspaper (To place under and around your table while you work.)
  • Sandpaper (I used 220)
  • Paint (I used spray paint. Almond color for the base, and stone texture over it.)

See? I told you that you can do this easily. Now, take your sandpaper and table, go outside and sand just enough finish off so your paint will stick. Be sure to wipe off the dust before the next step.  (I apologize for not having photos of every step, I honestly just got too excited to remember to take some. If you have questions about anything, feel free to ask them in the comments section!)

Next, lay out some newspaper and get ready to paint!  As I mentioned before, I used an almond color spray paint for this part. For those of you who have never used spray paint, like myself, the biggest problem is trying to avoid runs. My advice is to do a small amount at a time and put about 10-12 inches between the can and the table. You can always do a second coat when the first one dries.  Don’t get too worried about messing it up.  If it looks like crap, you can sand it down and start over.


Let your table dry completely.  I wanted a textured look, so for this step I used Rust-oleum’s American Accents Stone textured spray paint.  If you use this as well, be sure to choose a color that will match your base color.  This paint will not completely cover up what is underneath it!!!  When using this product, do fast sweeps and multiple coats.  The less you spray, the less texture you will get.   When you decide you’re happy with the look, let it dry and you’re done!


I hope you enjoyed this project.  I will have some more posted soon, so be sure to check back in a few days!  Remember to always sand and paint in well ventilated areas!

This gallery contains 12 photos.

If you’re anything like me, you have a lot of empty wall space in your child’s room.  This is an easy and quick way to add a personal touch without overdoing it.  Just remember to place them high enough so a small child can’t grab them and tear them down.  I would like to go […]